Guides · 20 steps
Install Ubuntu Server 24.04 LTS
Before CloudZH: put Ubuntu Server on your spare PC. You need a USB stick with 8 GB or more and about 30 minutes.
Step 1
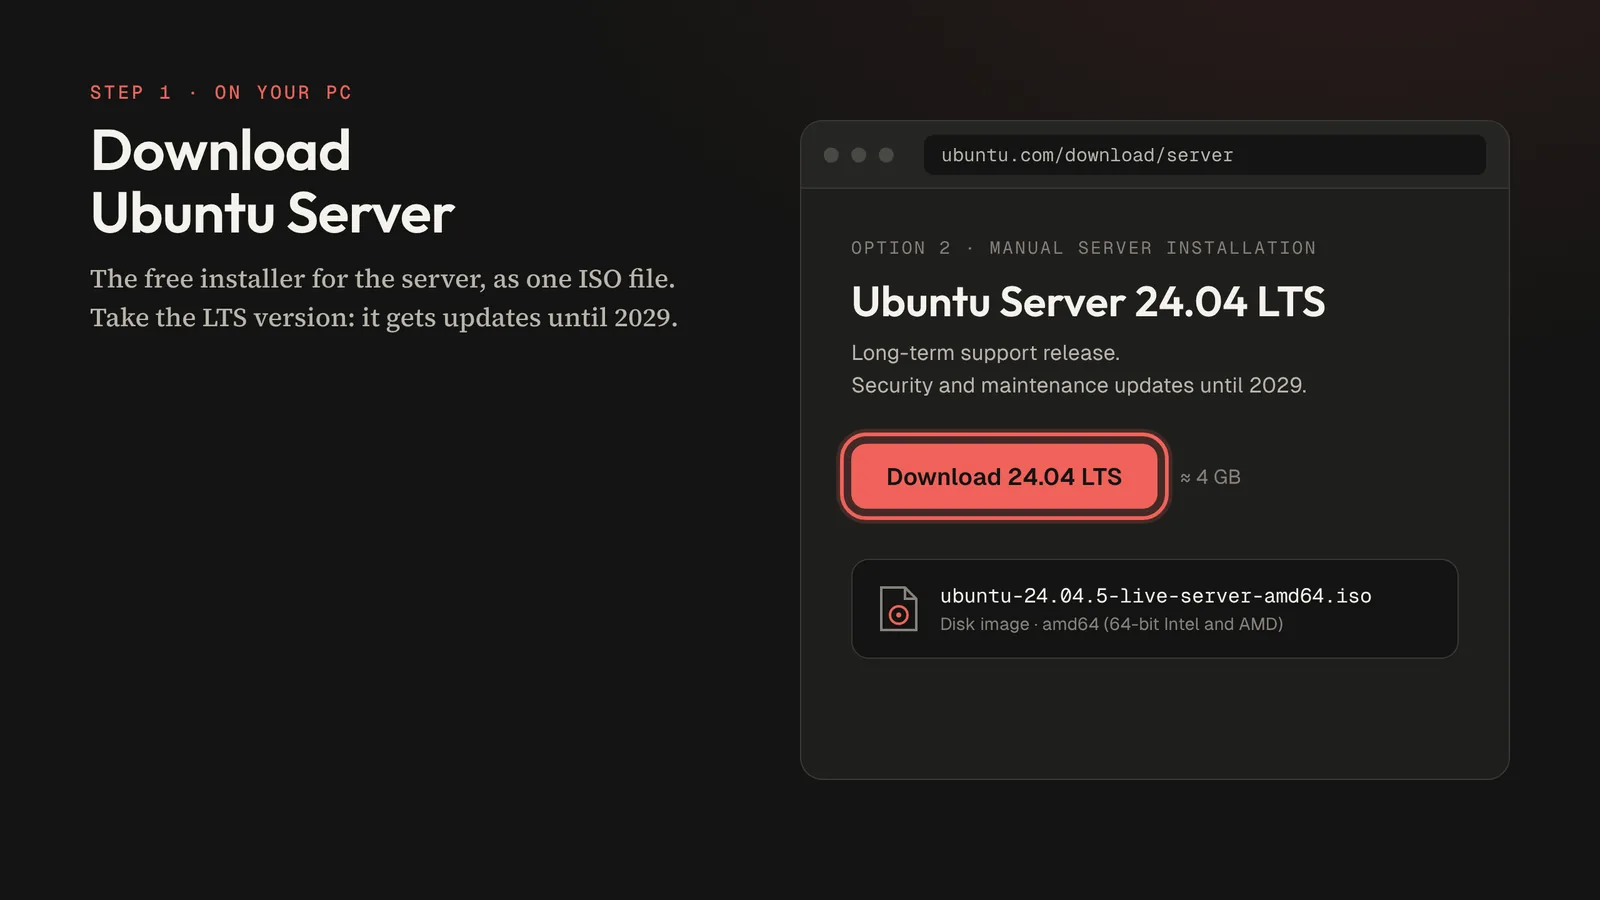
Download Ubuntu Server
On your everyday computer, open ubuntu.com/download/server and download Ubuntu Server 24.04 LTS (manual server installation). You get one ISO file of about 4 GB.
Step 2
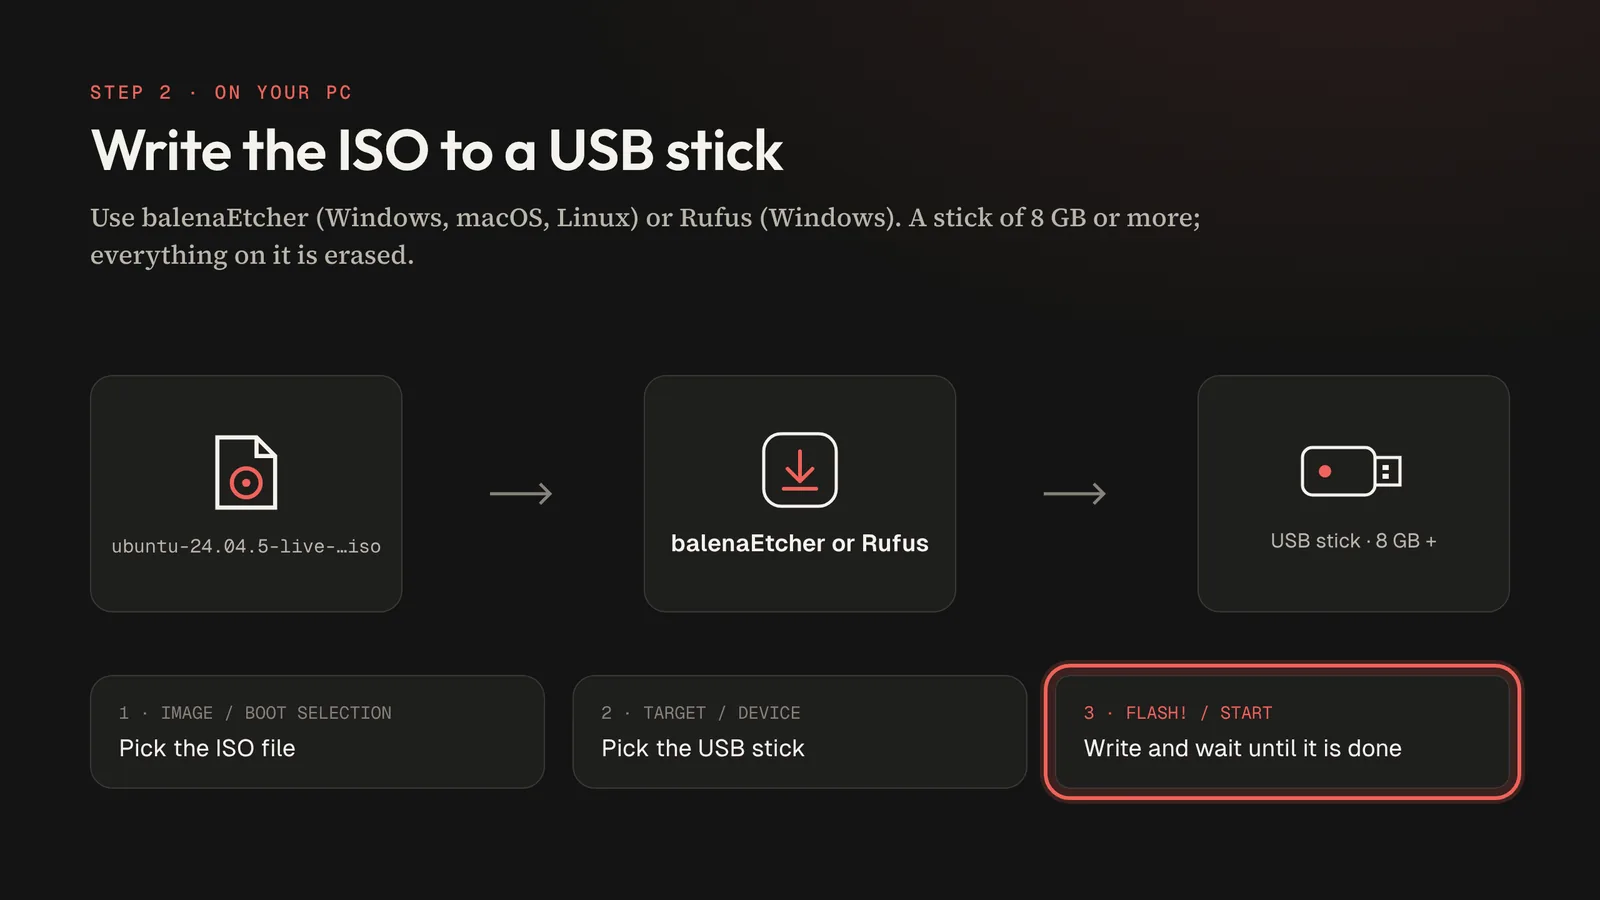
Write the USB stick
Install balenaEtcher or Rufus, pick the ISO file and your USB stick, then start writing. Everything on the stick is erased, so use an empty one.
Step 3
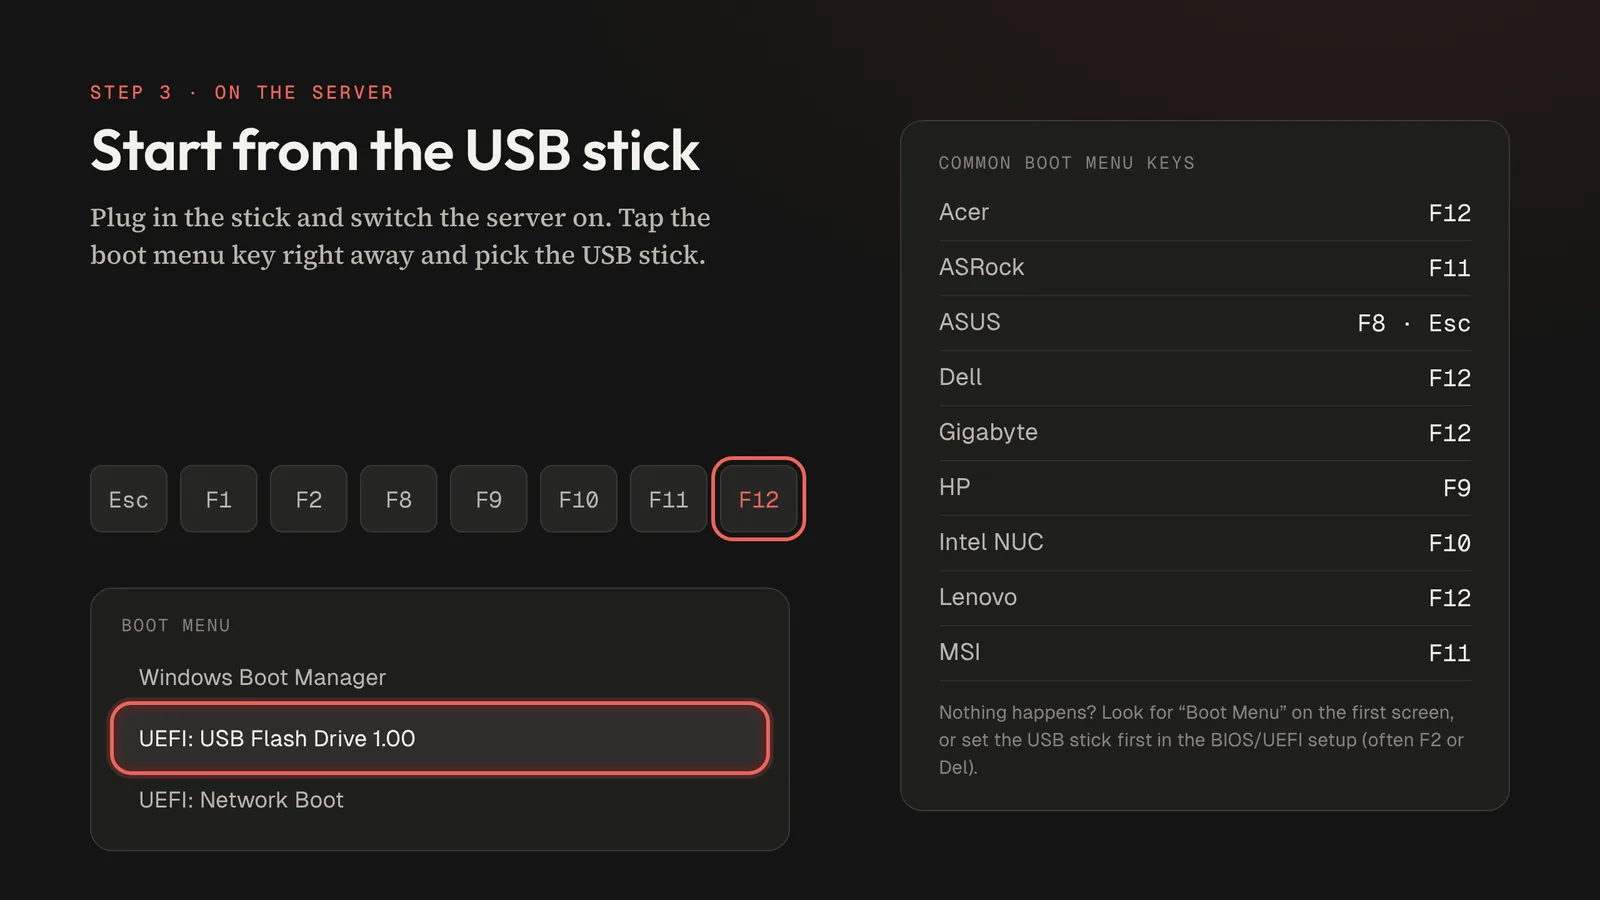
Start the server from the stick
Plug the stick into the server, connect the server to your router with a network cable and switch it on. Tap the boot menu key right away (often F12, F11 or Esc) and choose the USB stick.
Step 4
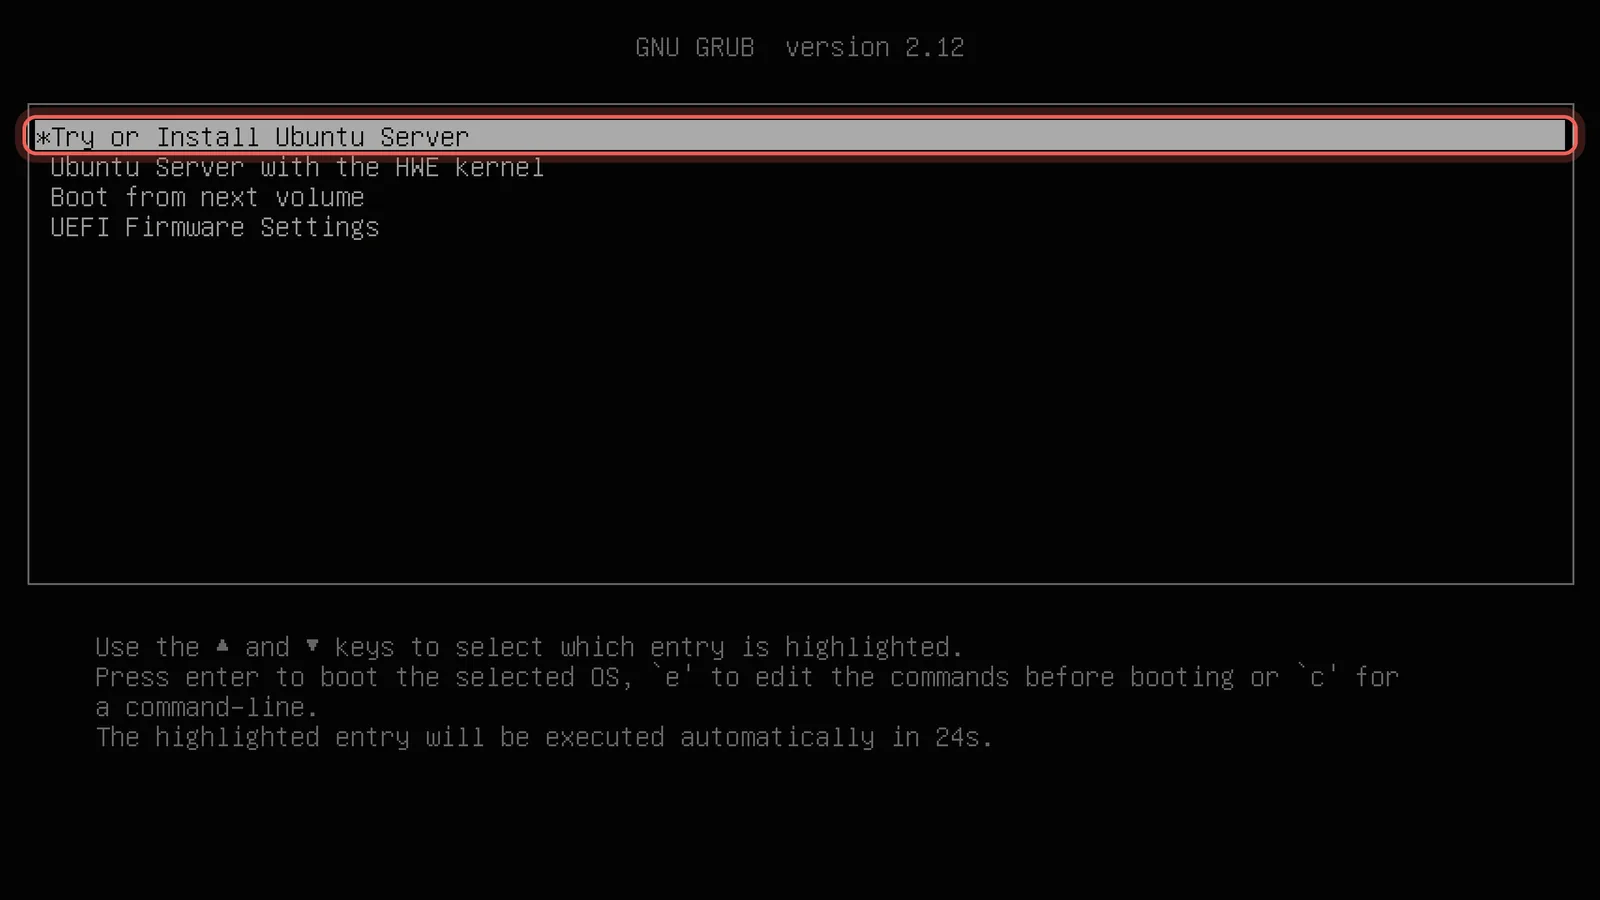
Start the installer
Keep Try or Install Ubuntu Server and press Enter, or wait 30 seconds. You do not need the other entries.
Step 5
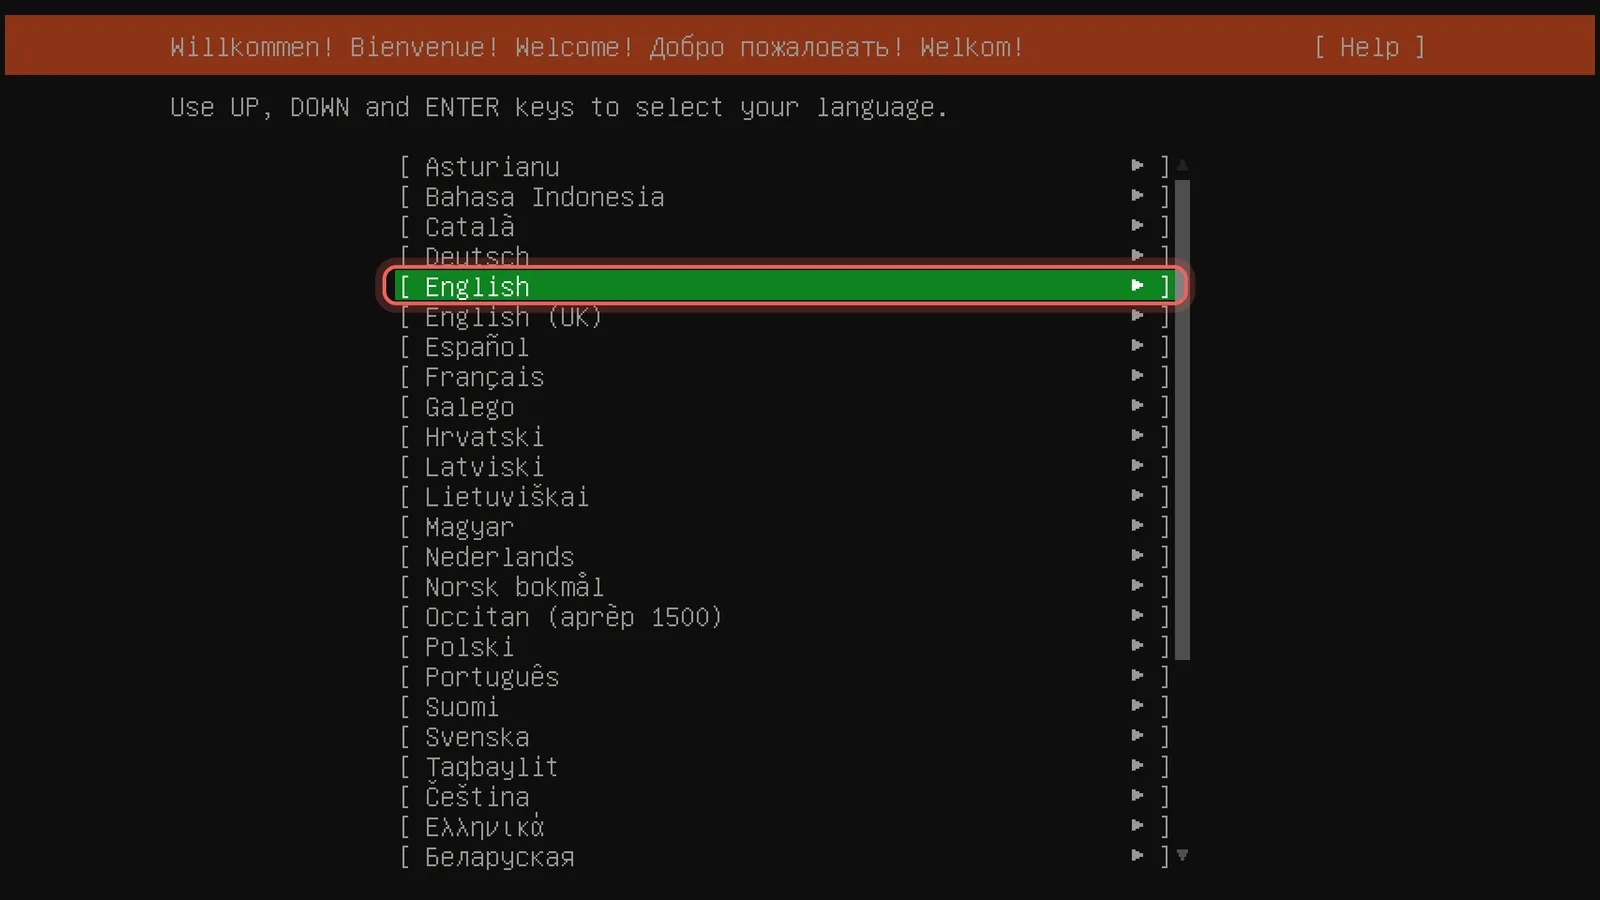
Pick the language
The installer works with the keyboard only: arrow keys to move, Space to tick, Enter to confirm. Choose English; error messages in English are the easiest to look up.
Step 6
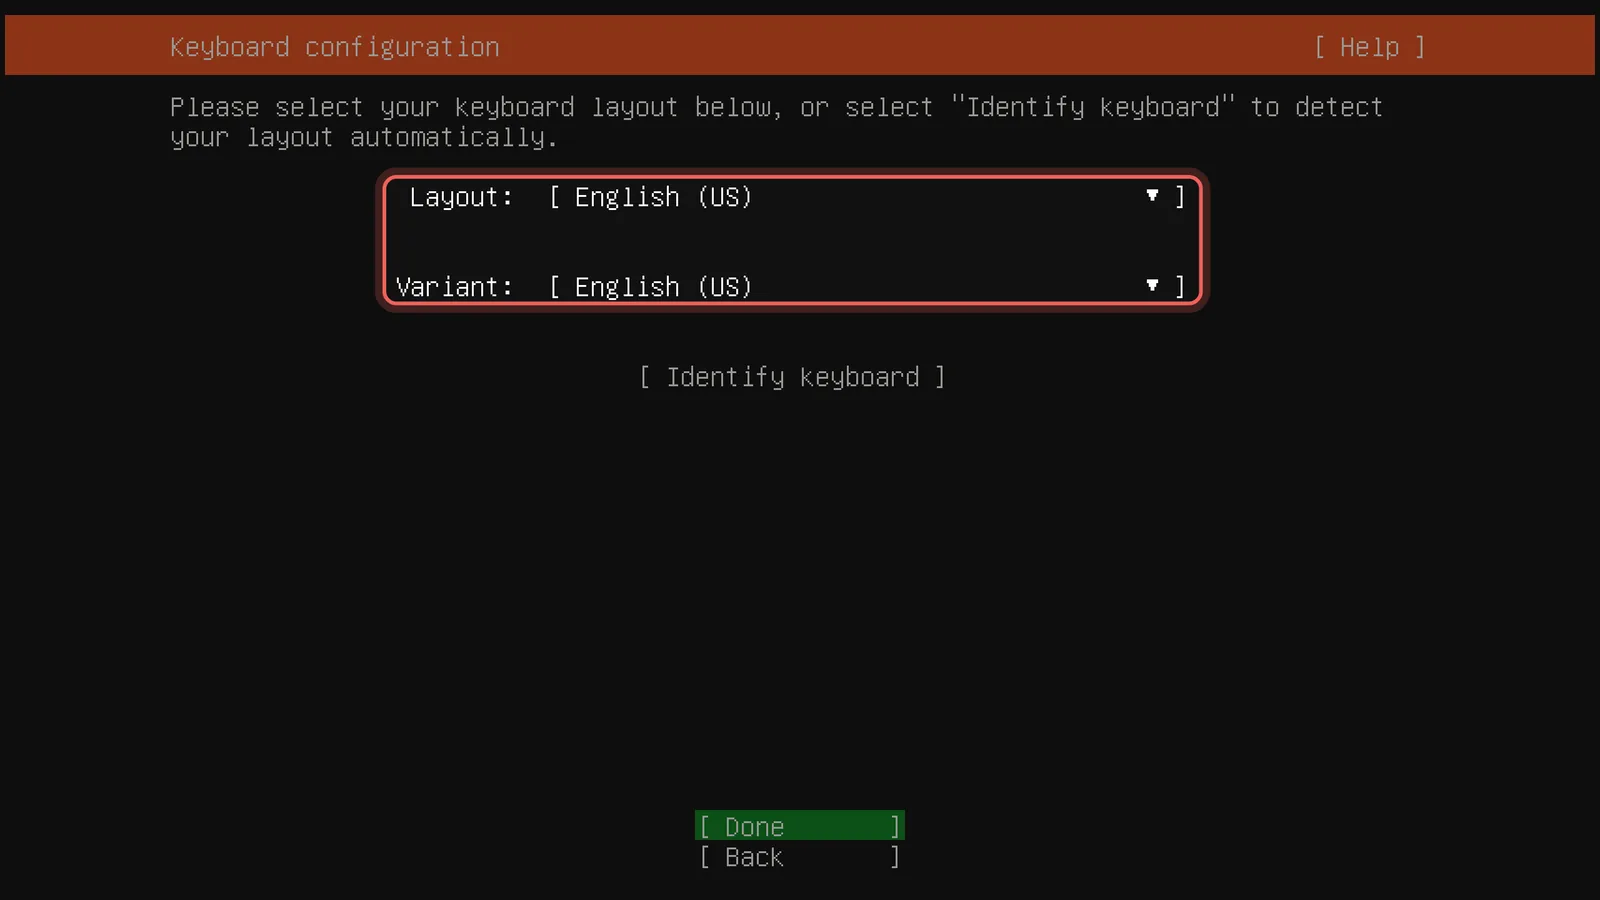
Set the keyboard layout
Choose the layout of your keyboard, for example German (Switzerland), so that your password is typed correctly later. Then Done. If Installer update available appears first, pick Continue without updating.
Step 7
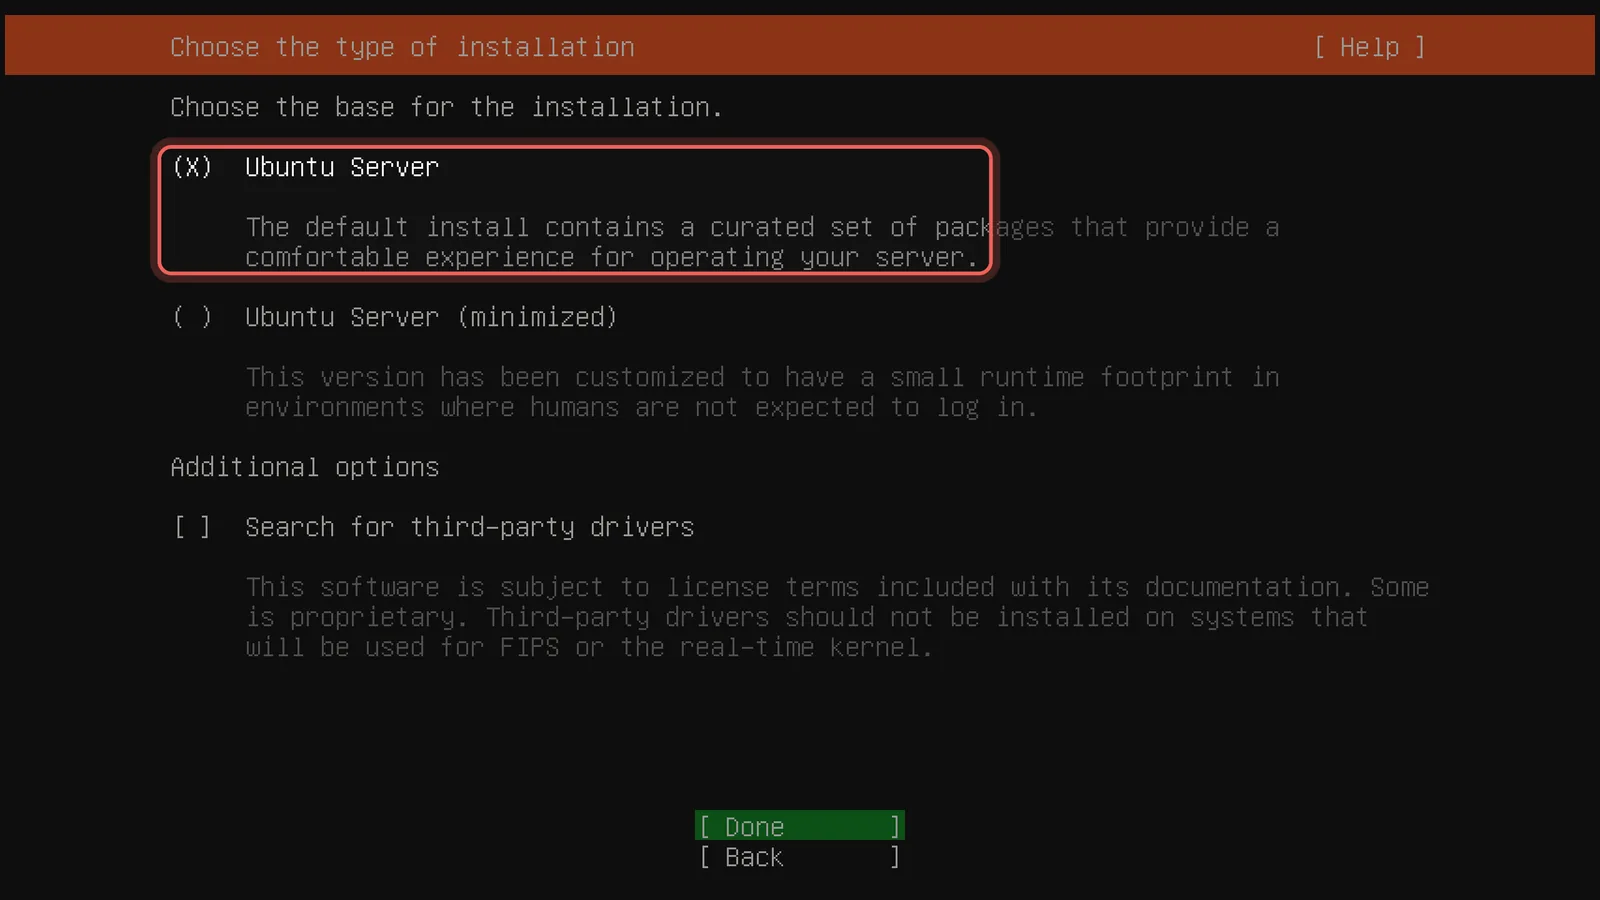
Keep Ubuntu Server
Leave Ubuntu Server selected, not the minimized version: it contains the everyday tools you will want on the server. Third-party drivers are not needed. Then Done.
Step 8
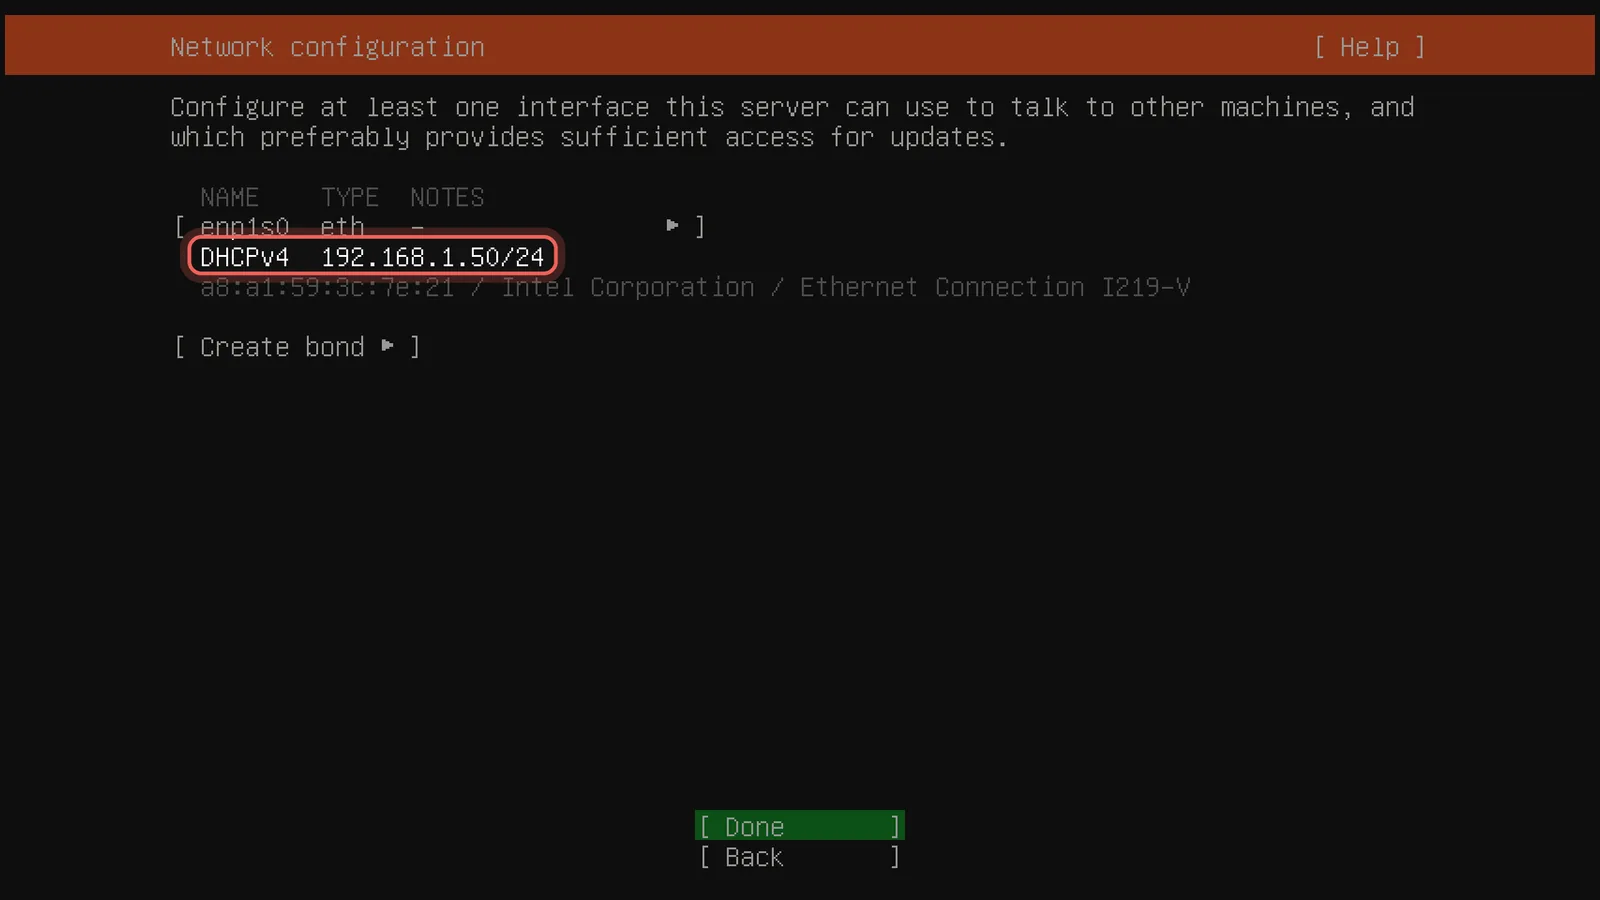
Note the IP address
With the network cable plugged in, your router gives the server an address automatically (DHCPv4). Write it down, here 192.168.1.50: you need it to install CloudZH and to open the dashboard. Then Done.
Step 9
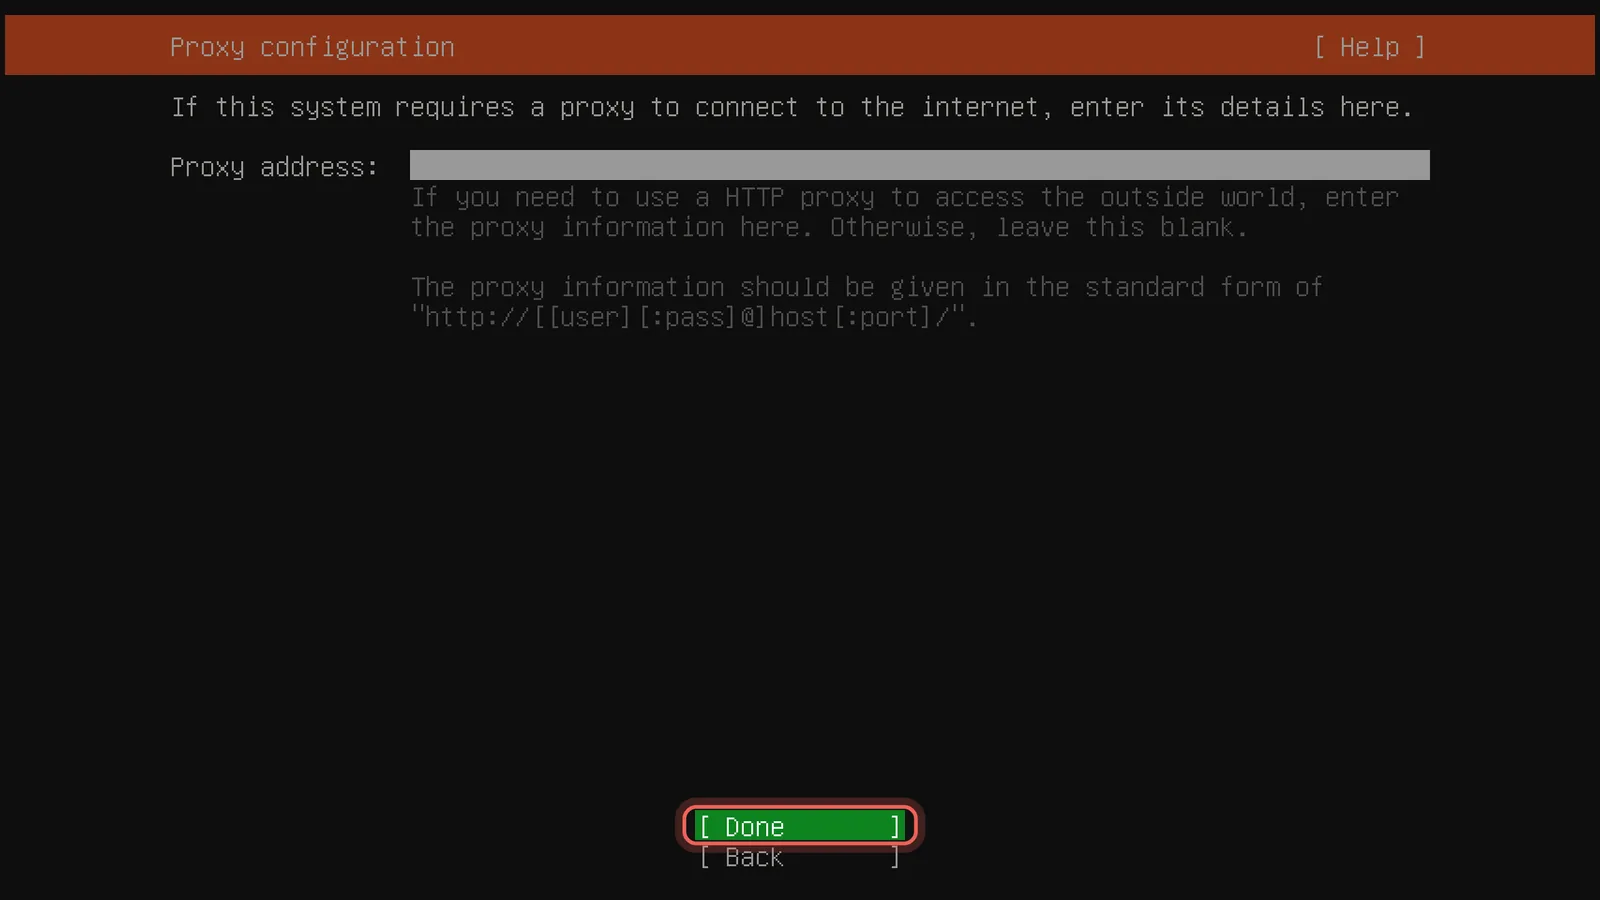
Leave the proxy empty
At home you do not need a proxy. Leave the field empty and choose Done.
Step 10
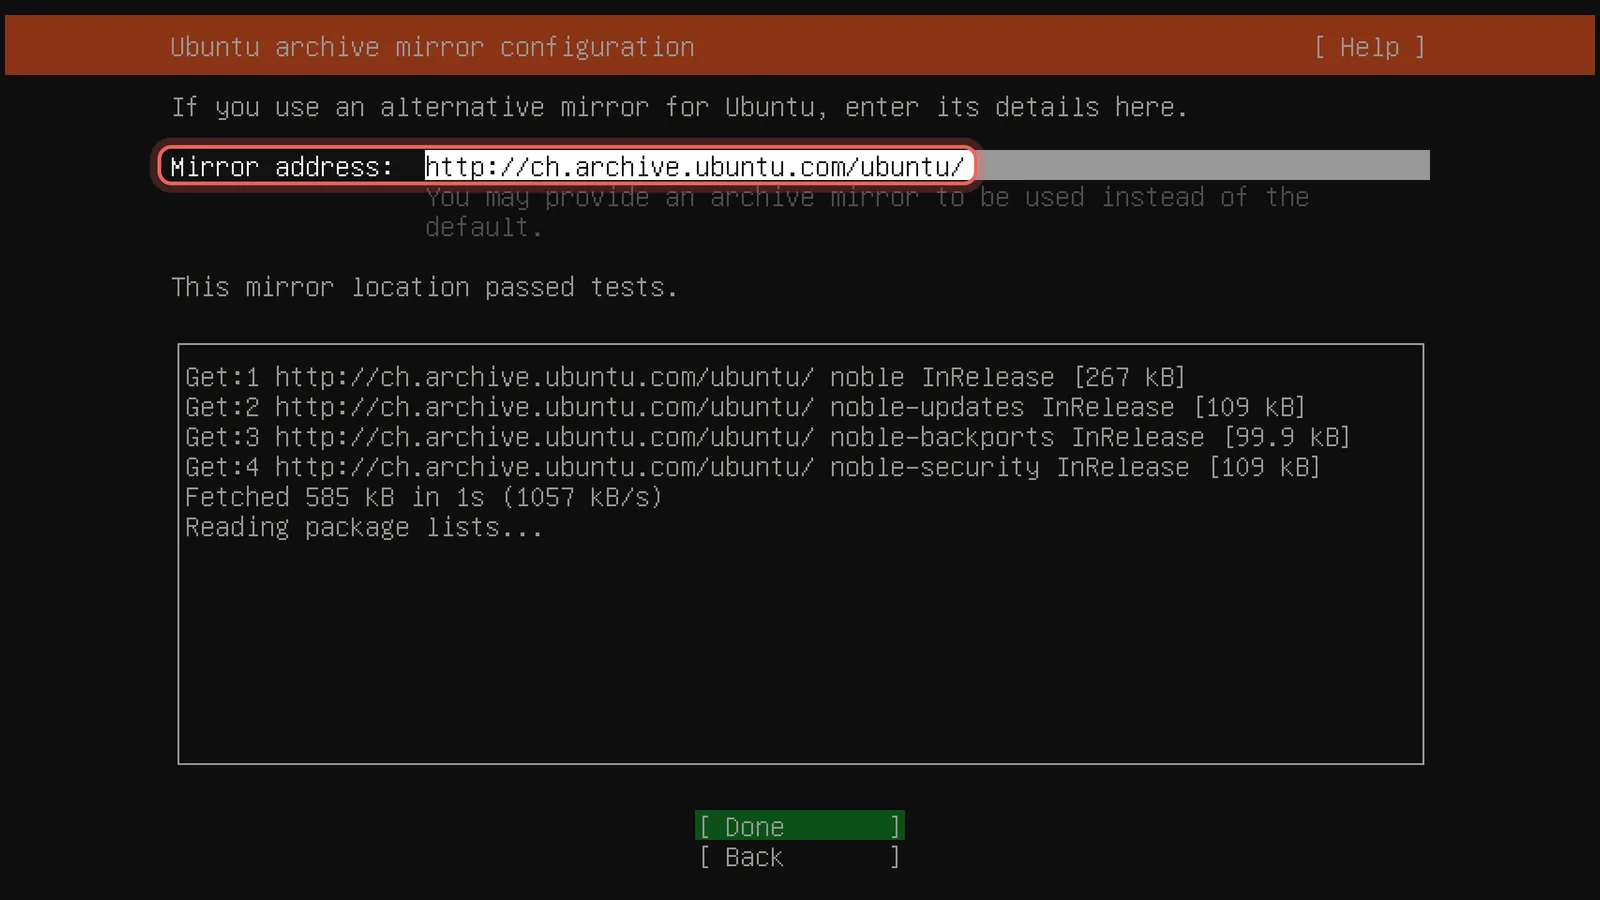
Keep the suggested mirror
The installer picks a download server in your country and tests it. Wait for This mirror location passed tests, then Done.
Step 11
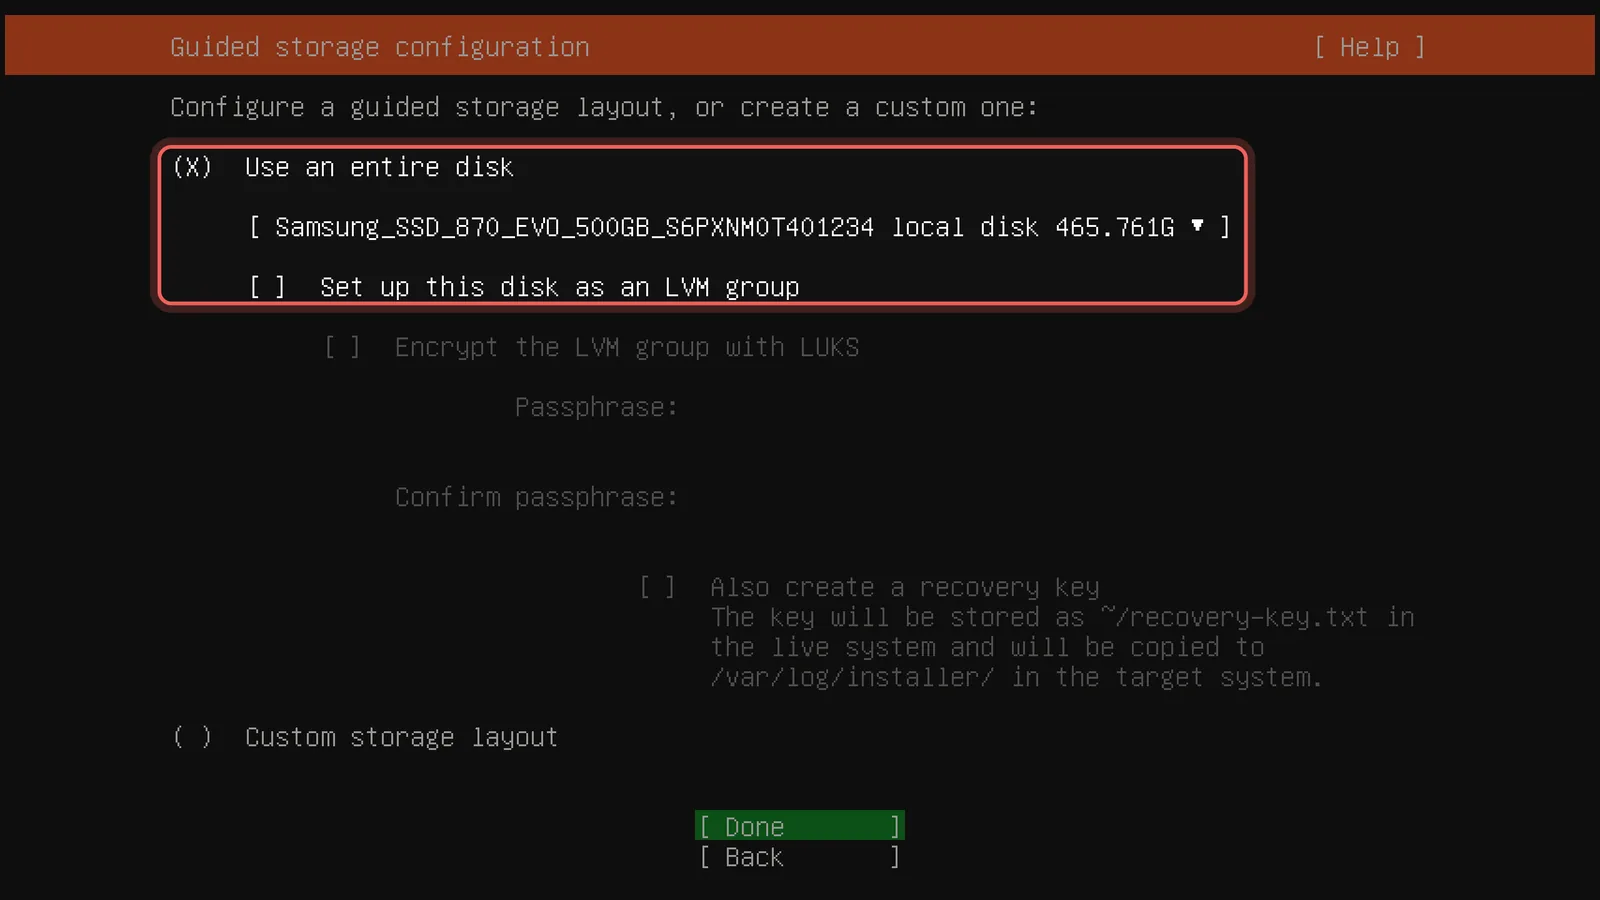
Use the entire disk
Keep Use an entire disk and pick the disk for Ubuntu. Untick Set up this disk as an LVM group with Space, so the whole disk is usable and not only 100 GB. Everything on this disk is erased.
Step 12
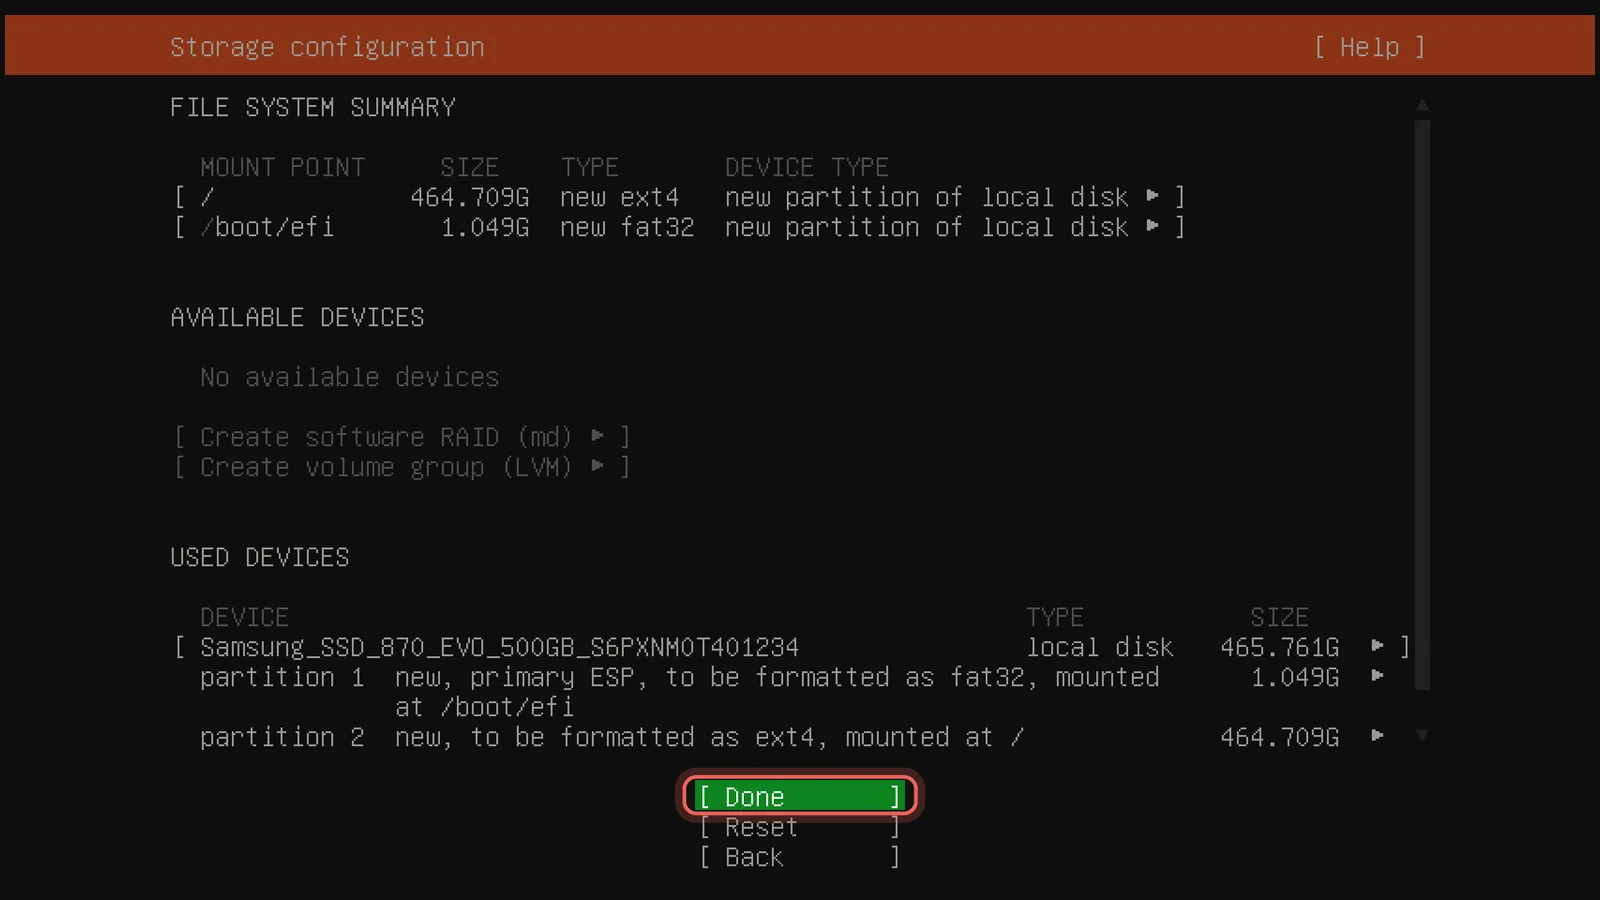
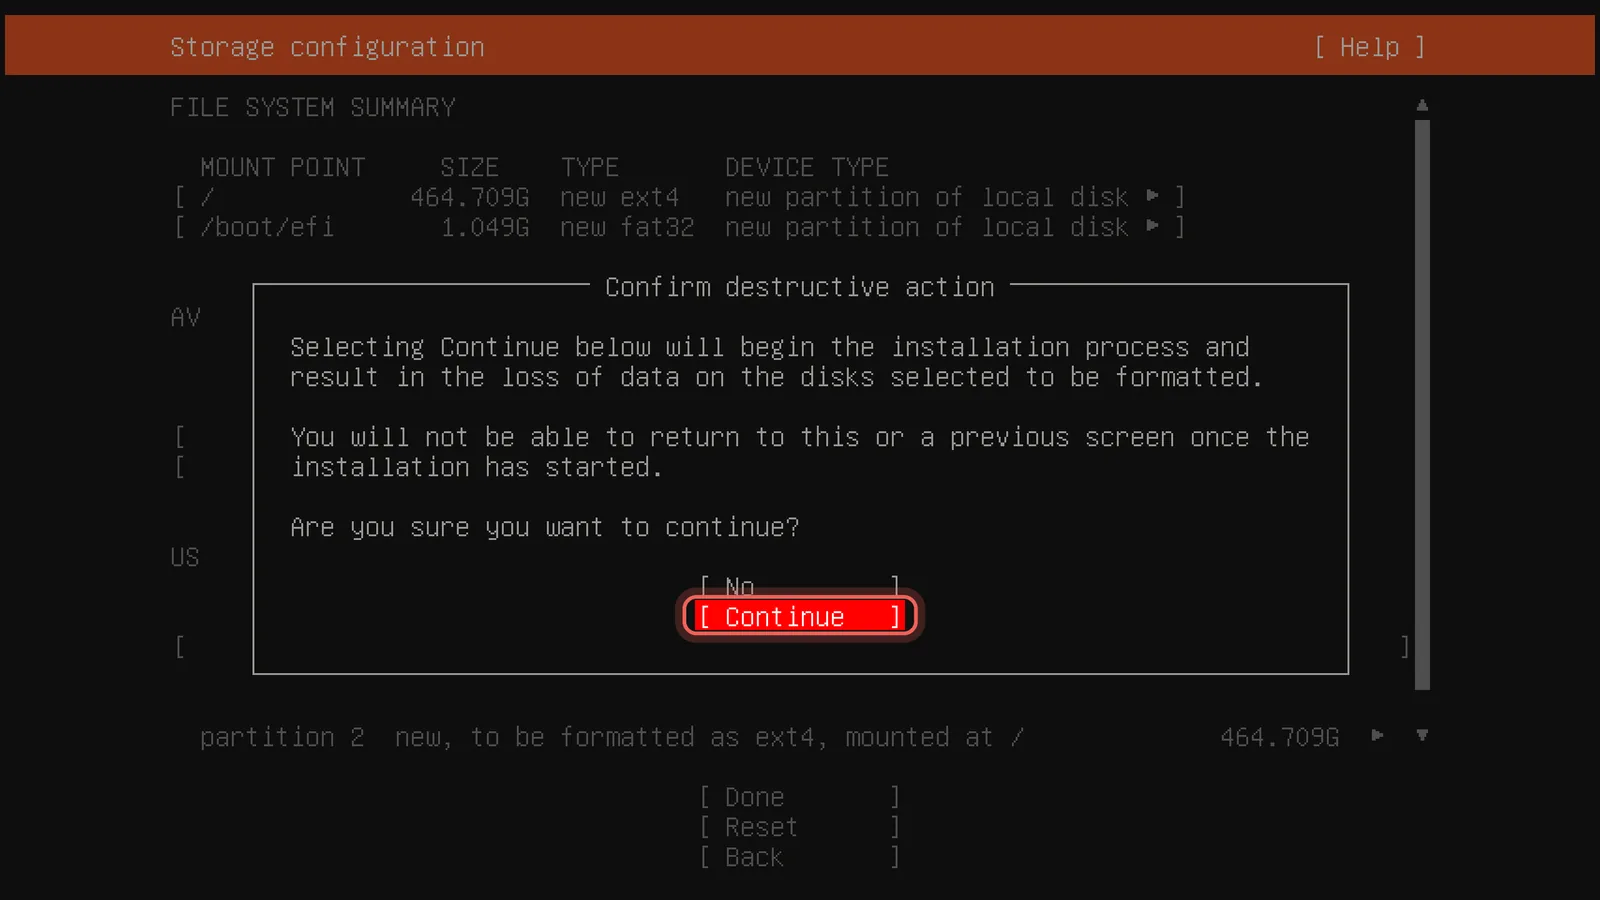
Check the summary
You see a small boot partition and one large partition for / that takes the rest of the disk. That is right, choose Done.
Step 13
Confirm
This is the last moment before the disk is erased. Choose Continue: the installation starts in the background while you fill in the next screens.
Step 14
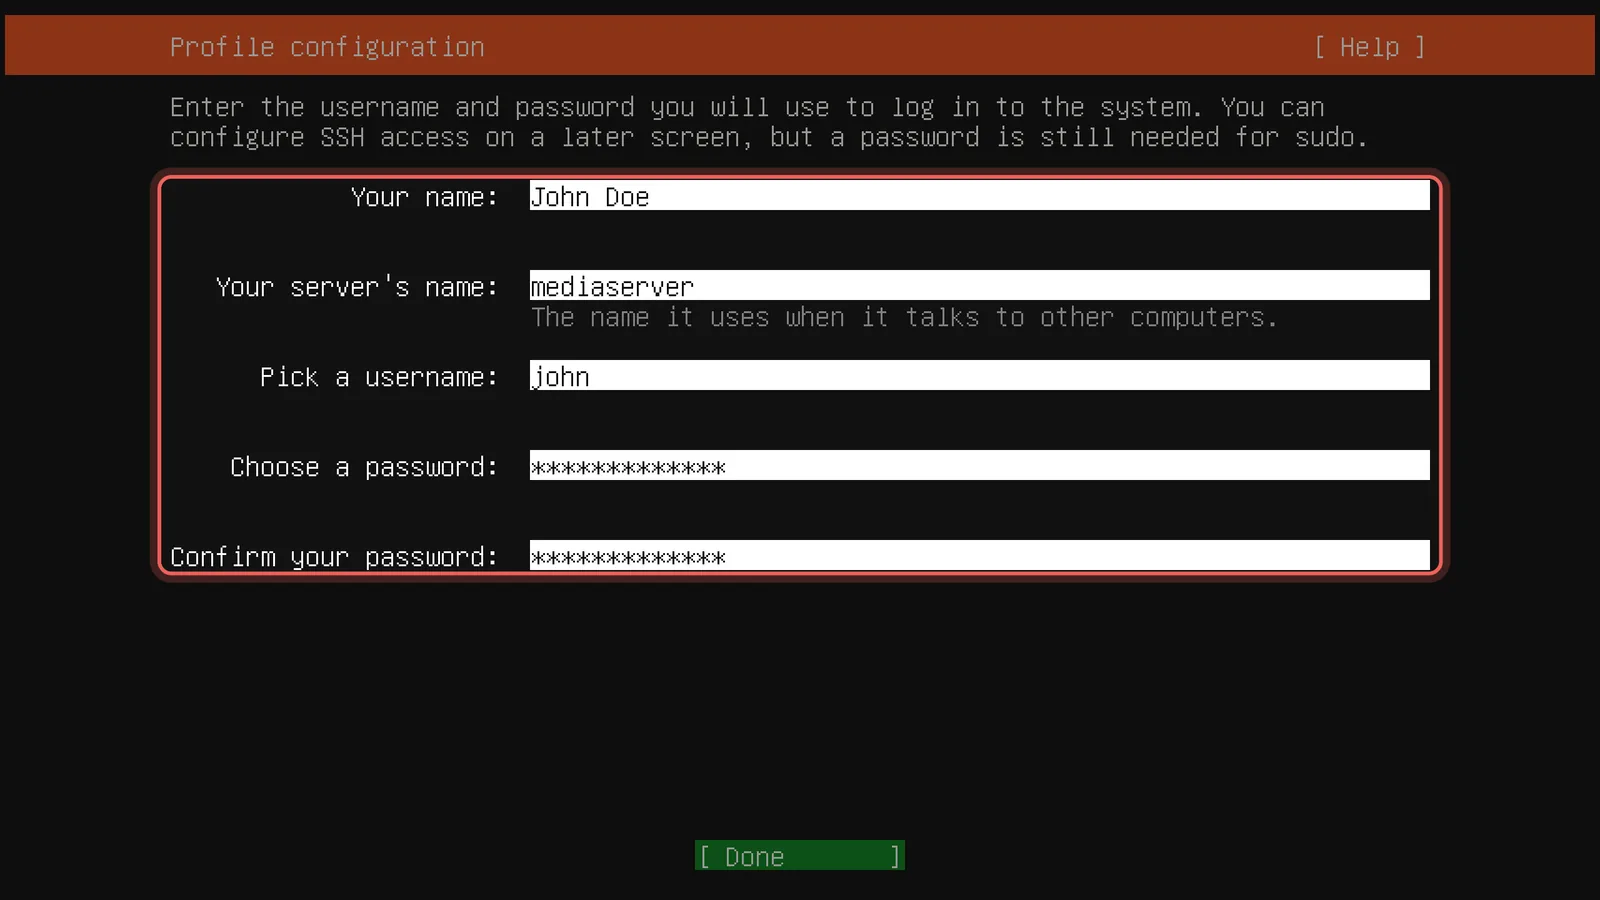
Create your user
Enter your name, a name for the server (here mediaserver), a username and a password; Tab moves to the next field. Write down the username and password: you need them to log in and to install CloudZH.
Step 15
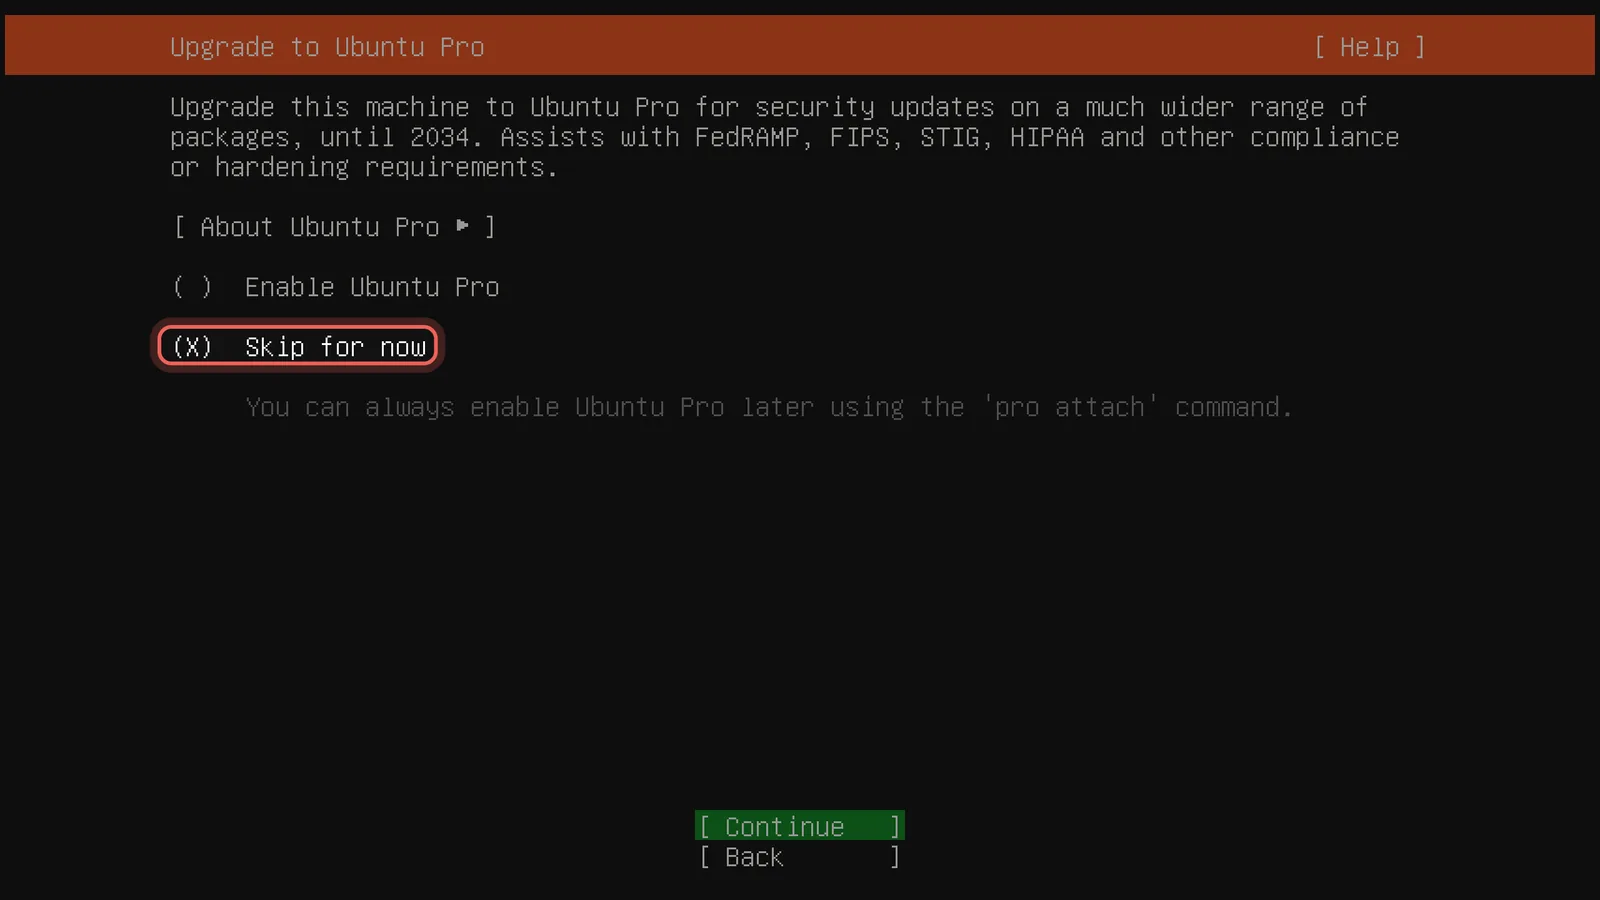
Skip Ubuntu Pro
Leave Skip for now selected and choose Continue. Ubuntu Pro is optional and can be switched on later with sudo pro attach.
Step 16
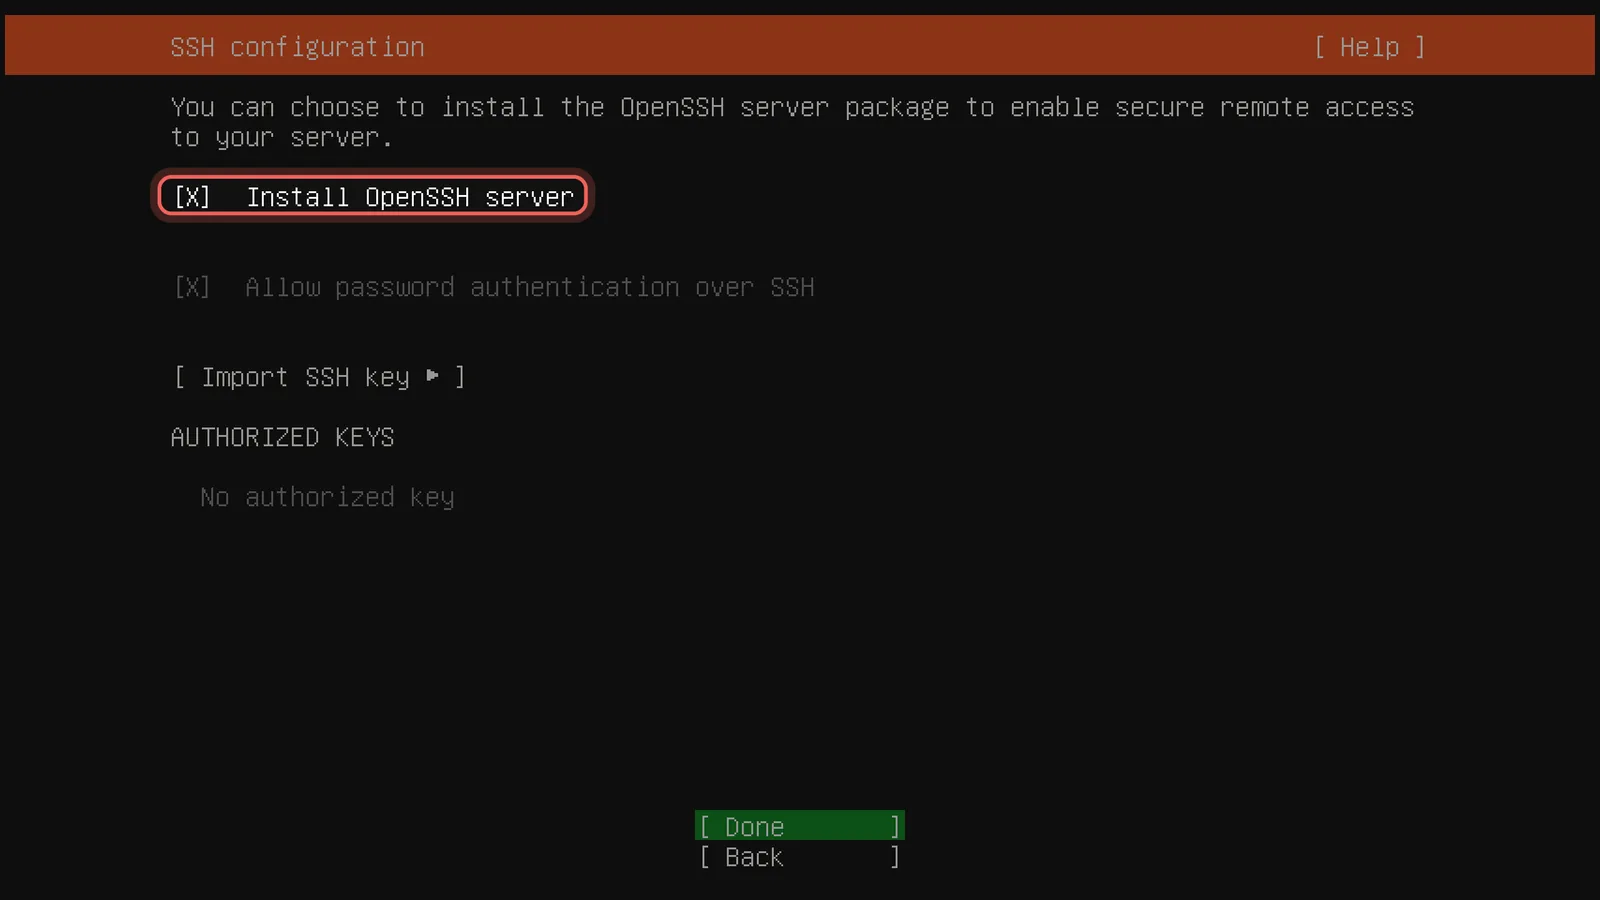
Install the OpenSSH server
Tick Install OpenSSH server with Space. This one matters: you install CloudZH by pasting one command over SSH from your own computer, and the server can then run without a screen.
Step 17
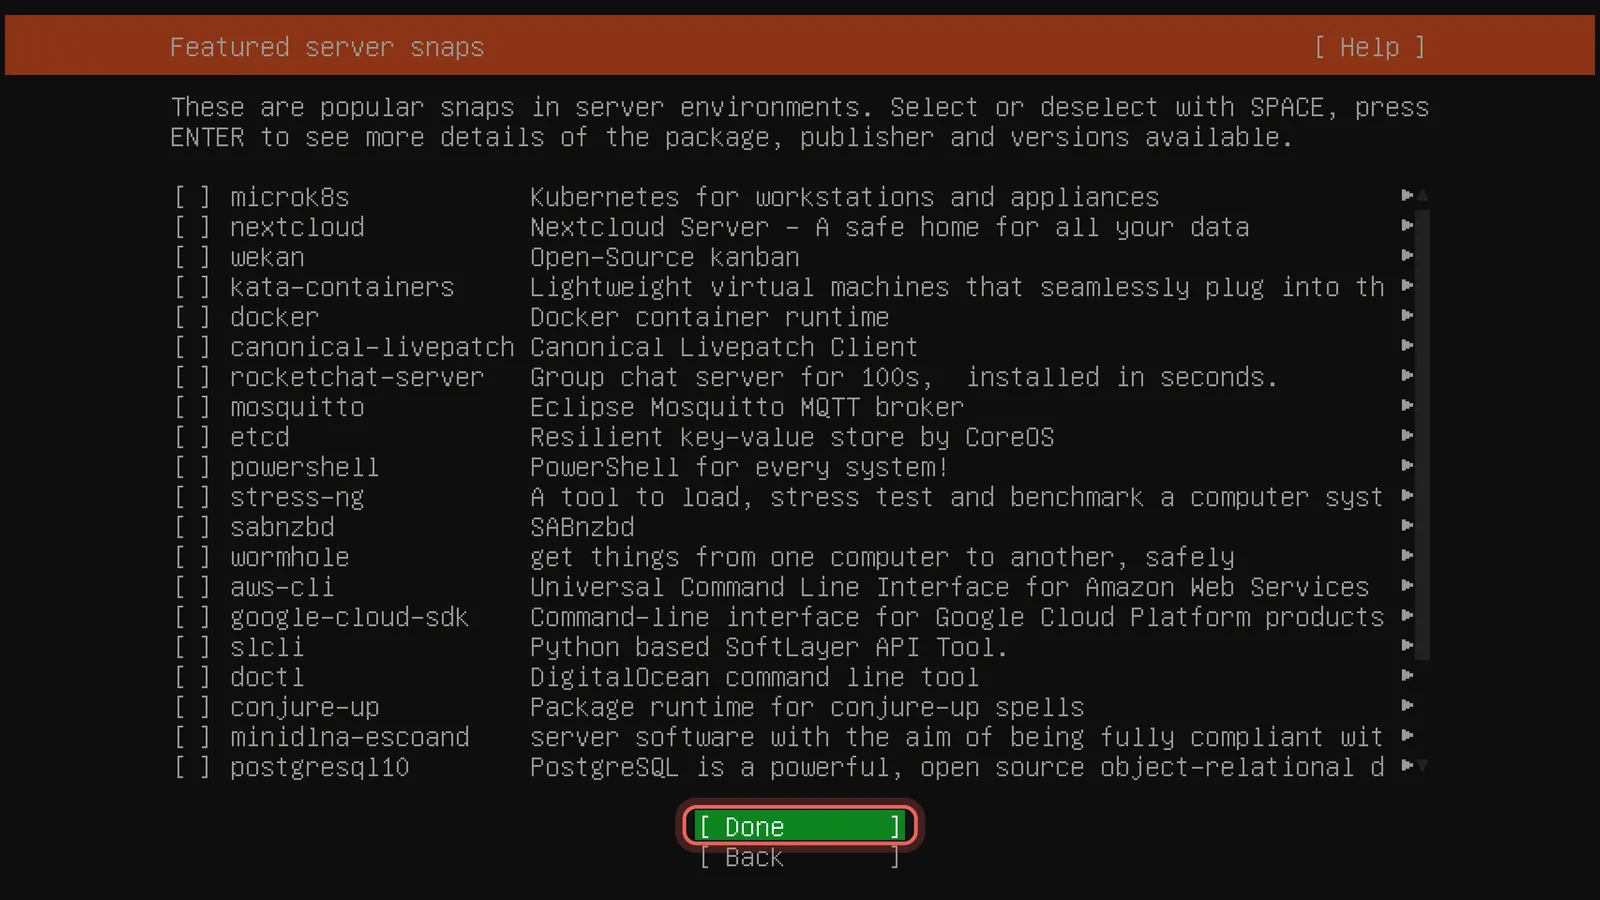
Select no snaps
Leave every box empty and choose Done. CloudZH installs the apps it needs itself, for example Docker; a second copy from here would only get in the way.
Step 18
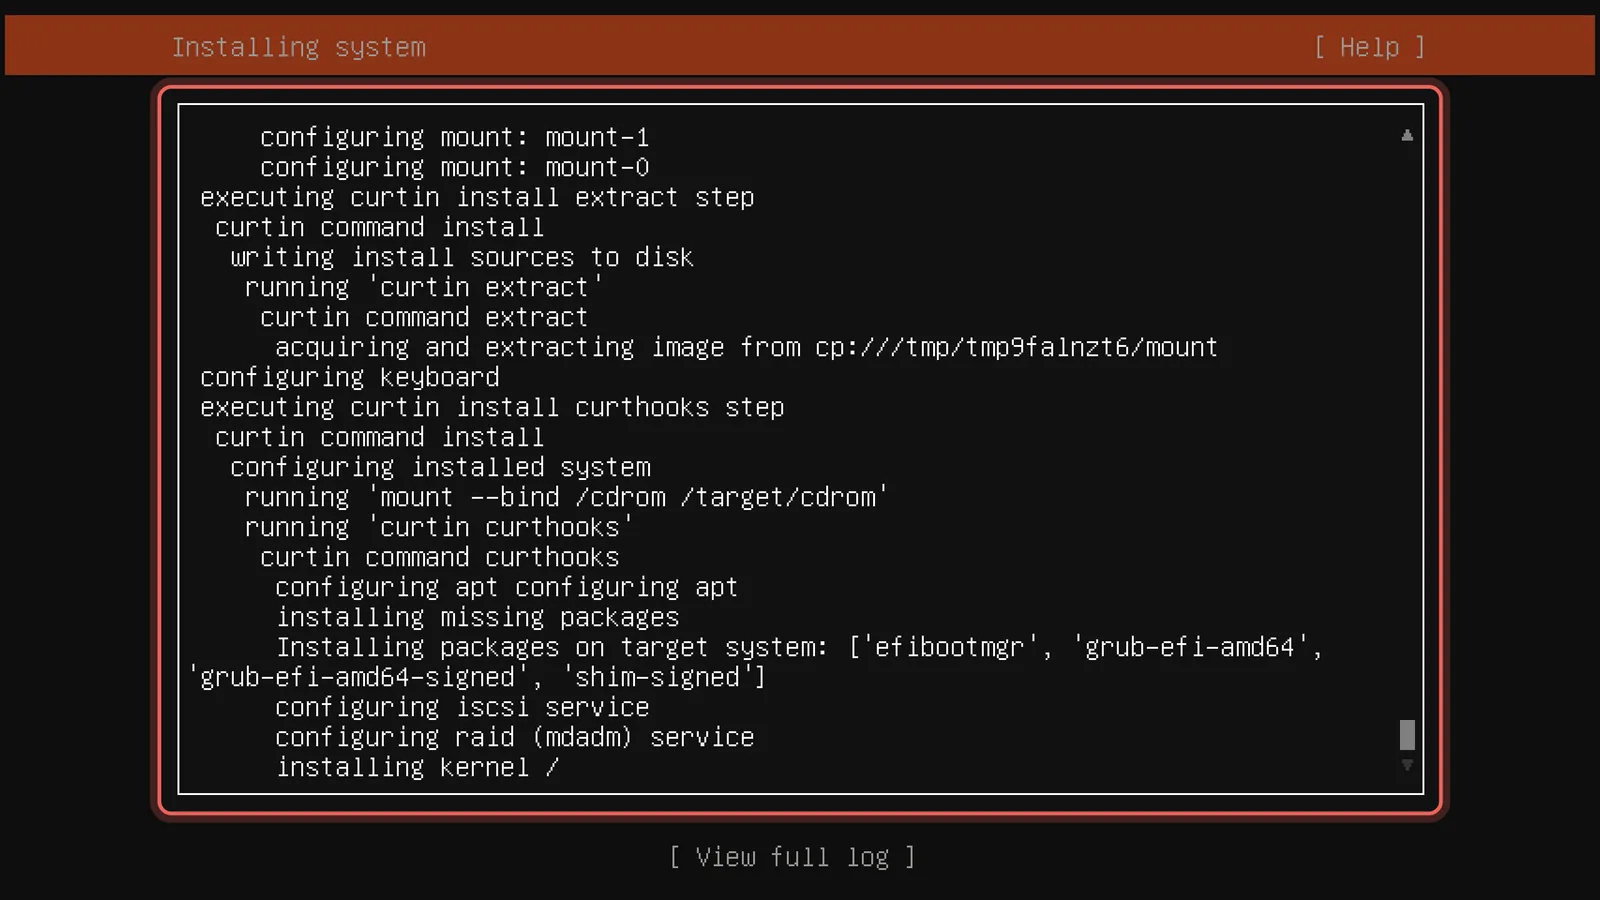
Wait for the installation
Ubuntu copies the system to the disk and then downloads the latest security updates. Depending on the PC and your internet connection this takes 5 to 20 minutes.
Step 19
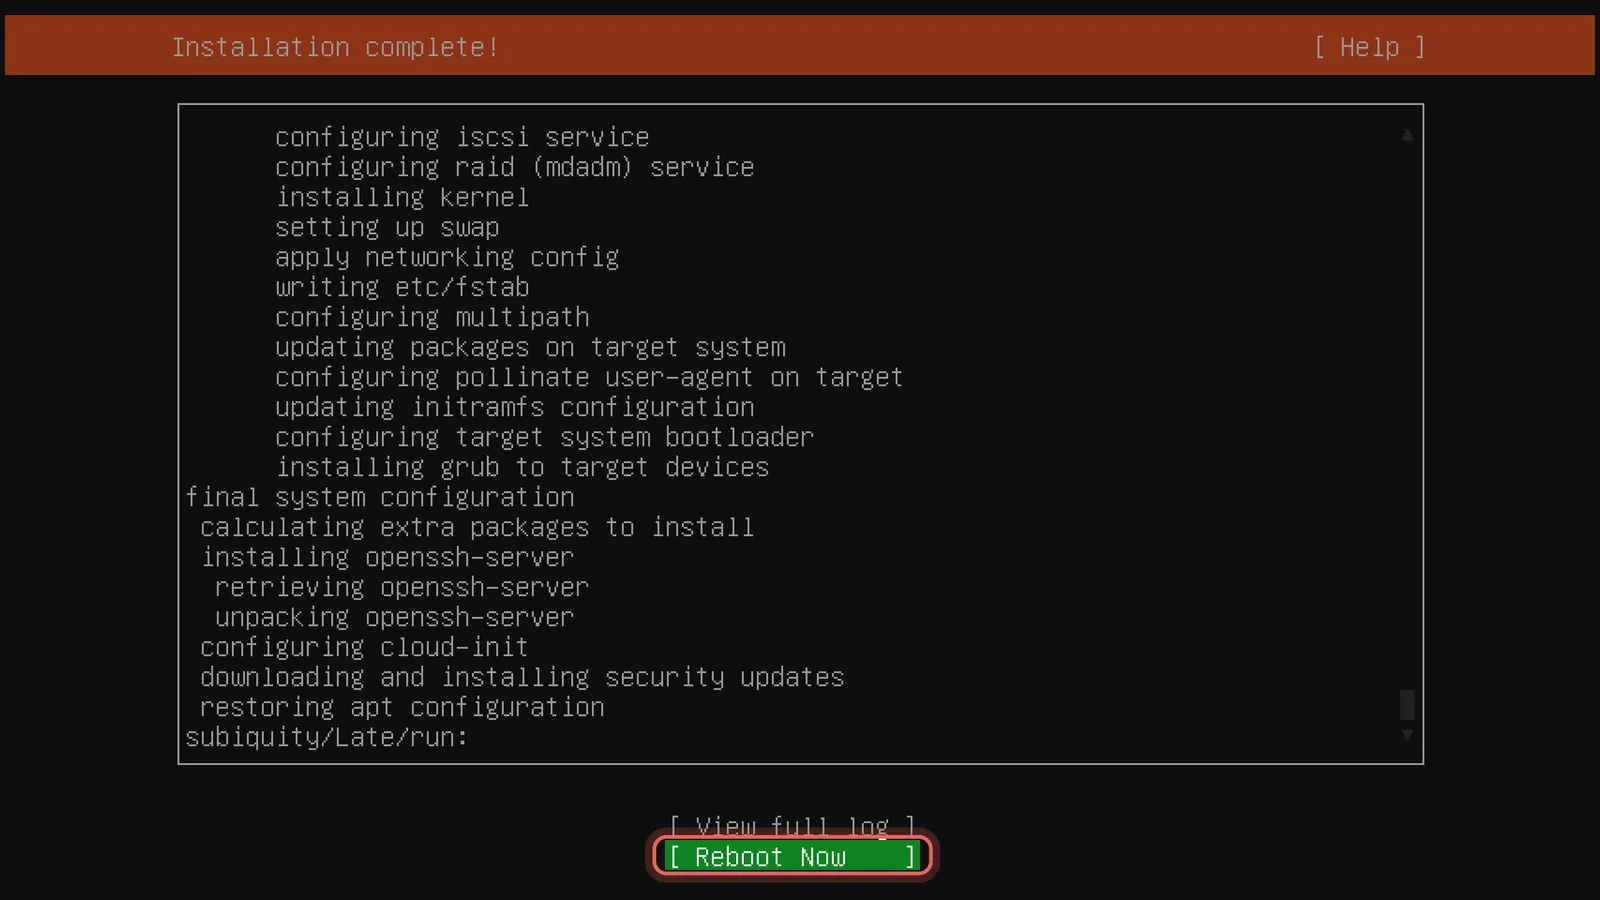
Restart the server
When Installation complete! appears, choose Reboot Now. Remove the USB stick when you are asked to and press Enter, so the server starts from its disk.
Step 20
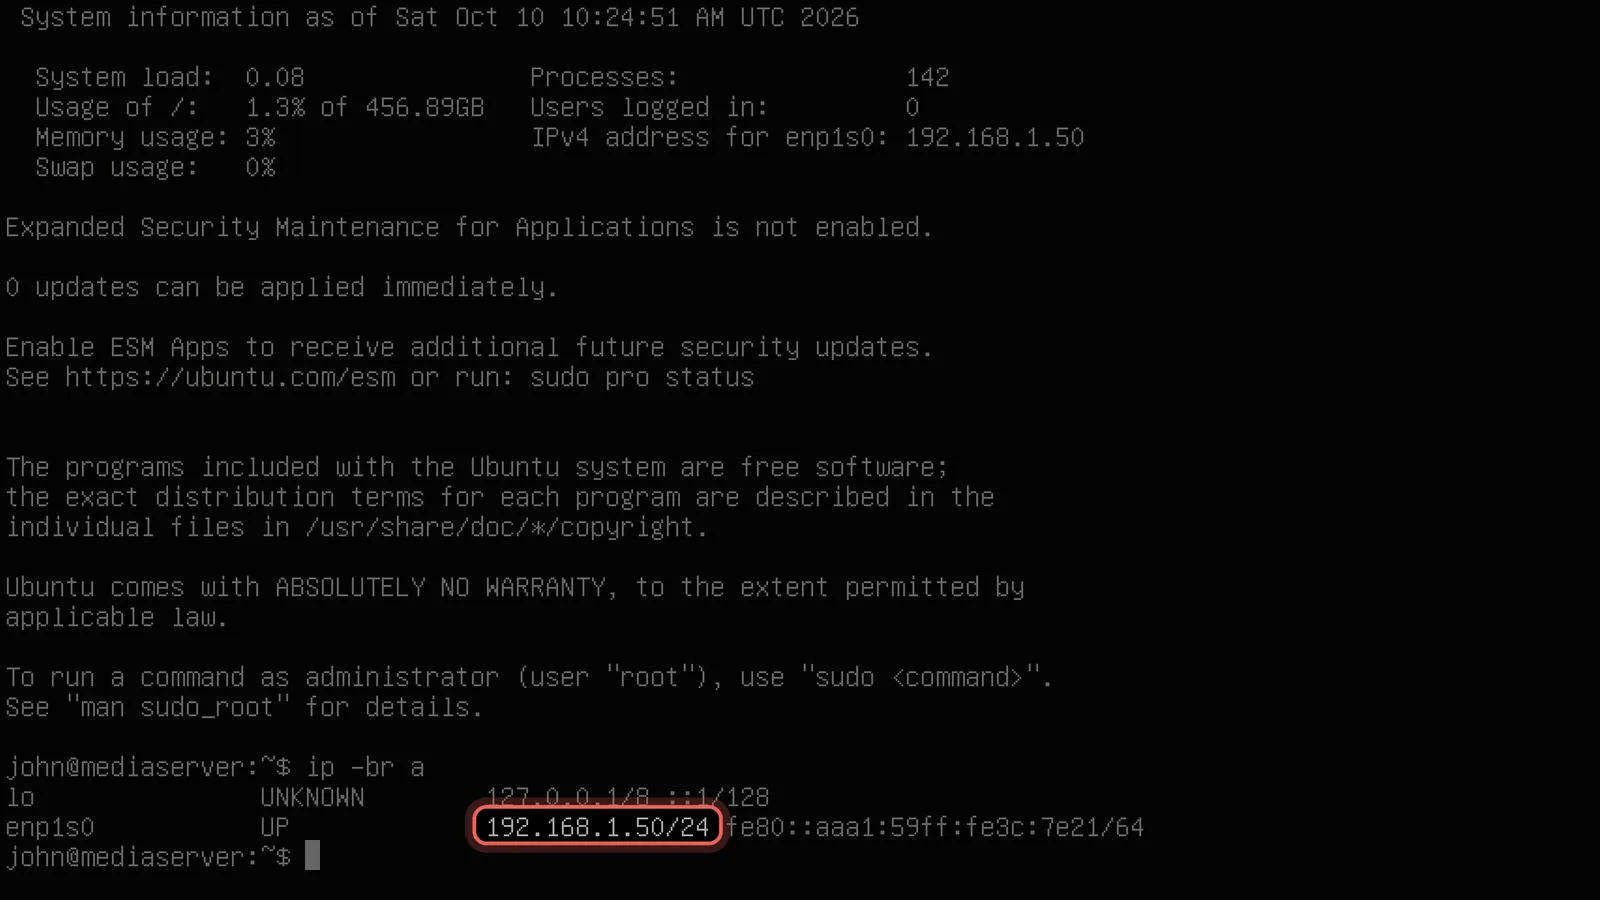
Log in and check the address
Log in with your username and password (the password stays invisible while you type). Type ip -br a and press Enter: the address in the line with UP is the one for CloudZH. From now on you can work from your own computer with ssh john@192.168.1.50.
Screens from the Ubuntu Server 24.04.5 installer, example values only.